From Earth to Cup
· COFFEE PROCESSING · COFFEE ROASTING · BREWING AND MERCHANDISE · COFFEE SHOPS · BARISTA TRAINING ·
· COFFEE PROCESSING · COFFEE ROASTING · BREWING AND MERCHANDISE · COFFEE SHOPS · BARISTA TRAINING ·
HISTORY
According to a coffee history legend, an Arabian shepherd named Kaldi found his goats dancing joyously around a dark green leafed shrub with bright red cherries in the southern tip of the Arabian Peninsula. Kaldi soon determined that it was the bright red cherries on the shrub that were causing the peculiar euphoria and after trying the cherries himself, he learned of their powerful effect. The stimulating effect was then exploited by monks at a local monastery to stay awake during extended hours of prayer and distributed to other monasteries around the world. Coffee was born.
Despite the appeal of such a legend, recent botanical evidence suggests a different coffee bean origin. This evidence indicates that the history of the coffee bean beagan on the plateaus of central Ethiopia and somehow must have been brought to Yemen where it was cultivated since the 6th century. Upon introduction of the first coffee houses in Cairo and Mecca coffee became a passion rather than just a stimulant.
Bean Processing

COFFEE PROCESSING
Irrespective of the harvesting method, green coffee beans and overripe coffee cherries inevitably end up mixed with the perfectly ripe cherries and must be separated during coffee processing. Overripe coffee cherries, undeveloped coffee cherries, sticks and leaves float in water. Ripe coffee beans and green coffee cherries are dense and sink. Therefore, the first step in coffee production consists of separating the “floaters” from the “sinkers.” The coffee floaters are usually sent directly to the patio to be dried and are often slated for internal consumption. The ripe and green cherries can be sent to the patios to be dried using the natural process of preparing coffee or can be sent to the coffee pulping machines.
Coffee Processing Equipment
The first stage of coffee pulping is used to remove the green coffee cherries from the ripe cherries. In the coffee pulping machinery, the internal pressure is monitored to push the coffee against a screen with holes only large enough for a coffee bean (not cherry) to pass through. Since the ripe cherries are soft, they break and the coffee seed is released through the screen.
Pulping Coffee
The green cherries are hard and cannot be pulped. Instead of passing through the screen, the green coffee beans pass to the end of the barrel system and are separated from the ripe coffee beans. The pressure inside the barrel controls how many cherries will be pulped. A very high pressure will cause all of the cherries including the green beans to be pulped. It is necessary to continuously monitor the pressure so that about 3% of ripe cherries are not pulped and are removed with the green cherries. This margin of error ensures that no green cherries are mistakenly pulped. The pulp and coffee beans are then separated by centrifugal force and a barrel screen system.

Coffee Fermentation
The coffee beans covered in the slippery mucilage can be sent to the patios to dry as pulped natural coffees or can be sent to coffee fermentation tanks. The coffee fermentation tanks are used to remove the mucilage before drying. The pulped coffee beans are put into cement tanks with water and are allowed to ferment for 16-36 hours. On the way to the fermentation tanks, another density separation can occur. The highest quality coffees are the densest and should be separated and fermented in a different tank.
The coffee fermentation time depends on a number of factors including the amount of coffee fermenting, water temperature, and humidity. The mucilage is made up of pectin materials including protopectin (33%), reducing sugars including glucose and fructose (30%), non-reducing sugars such as sucrose (20%), and cellulose and ash (17%) (Wrigley, 455). Protopectin is not water soluble and will hydrolyze to pectinic acid in the fermentation tanks (Wrigley, 455). Hydrolysis of the protopectin and degradation of the pectin by enzymes is the process that occurs to remove the mucilage during fermentation (Wrigley, 455). Currently, the best way of determining the end of coffee fermentation is to feel the coffee beans to determine if they are still encased in mucilage. If the coffee beans are fermented for 36-72 hours, stinker beans develop. Lactic, acetic, and propionic acids are produced in this process and are believed to prevent the traditional fermentation taste by inhibiting mold growth that regularly occurs during drying on a patio in humid conditions (Wrigley).
Coffee Drying

From the coffee fermentation tanks, the beans are moved to drying patios and dried to 11-12% moisture content. See coffee drying section for more details. A small portion of the lot is hulled and milled by a mini-huller. Three hundred grams of coffee is classified for defects (100 grams is often used), and the percentage of each screen size is determined. Then, 200-300 grams of coffee is roasted in a sample roaster and cupped to determine coffee quality. Ideally no lots will be mixed until the coffee has been classified and cupped. The coffee remains in pergamino until shipment time to help protect the flavor and aroma of the coffee.
Roasting

Coffee Roasting
Coffee roasting is a chemical process by which aromatics, acids, and other flavor components are either created, balanced, or altered in a way that should augment the flavor, acidity,aftertaste and body of the coffee as desired by the roaster.
Roasting Coffee BeansThe first stage is endothermic. The green beans are slowly dried to become a yellow color and the beans begin to smell like toast or popcorn.
The second step, often called the first crack, occurs at approximately 205 °C (400 °F) in which the bean doubles in size, becomes a light brown color, and experiences a weight loss of approximately 5%. The corresponding Agtron number for this color is between 95-90 (Davids, 68-69).

In the next step the temperature rises from 205 °C to approximately 220 °C, the color changes from light brown to medium brown (Agtron # 60-50), and a weight loss of approximately 13% occurs (Davids, 68-69). The resulting chemical process is called pyrolysis and is characterized by a change in the chemical composition of the bean as well as a release of CO2.
The second step is followed by a short endothermic period which is followed by another exothermic step called the second crack. This second pyrolysis occurs between 225-230°C, and the roast color is defined as medium-dark brown (Agtron #50-45) (Davids, 68-69). The second pop is much quicker sounding and the beans take on an oily sheen.
Espresso potential is maximized in roasting when you maximize the sweetness and aroma of the coffee while minimizing the bitterness and acidity. Most people focus on the latter and therefore roast extremely dark, yet without sweetness and aroma the espresso will never be palatable. This explains the unpopularity of straight espresso and the popularity of espresso based drinks where either milk or other flavors are used to replace the sweetness that was lost by roasting darkly.
From 170-200°C the sugars in coffee begin to caramelize. From tasting pure sugar versus its caramelized component it is evident that uncaramelized sugar is much sweeter. The dark color of coffee is directly related to the caramelization of the sucrose in coffee. Therefore, to maximize sweetness you want to minimize the carmelization of sucrose, yet you do not want to roast too lightly or bitter tasting compounds will not thermally degrade. Stop the roast somewhere between the end of the first crack and less than half way through the second crack. Do not roast well into or past the second crack. We recommend a roasting chamber temperature somewhere between 205-215°C.
Realizing the danger of the following suggestion we might recommend a color similar to the one below. Note: All monitors, computers, and internet browsers will display the color slightly different. This is only a recommendation to point out that this color is preferable to the almost black color you will frequently observe for espresso. To get a better idea of roasting colors order the Agtron roasting classification kit from the SCAA.
| ROAST COLOR | 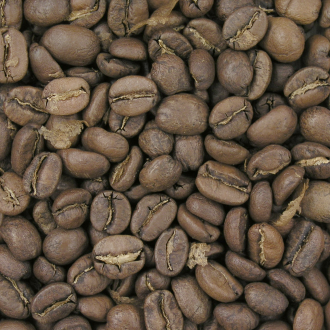 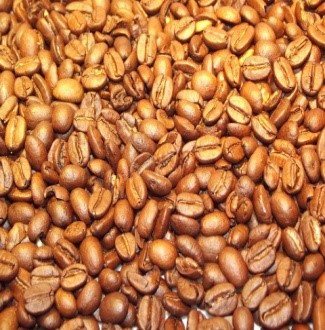 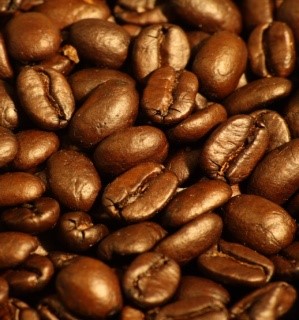 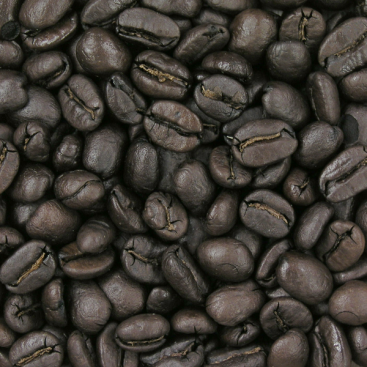 |
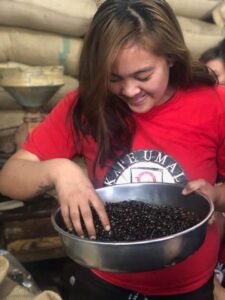
Kape Umali Coffee Co. micro roasting with GFI trade roasting provides the latest and best roasting facility in the Philippines, providing us with the best roasts and variety of flavors. We also do our own roasting for special blend coffee.
Cinnamon
The bean is light brown, and dry (no oil visible). The flavour is baked or “bready”, like toasted grain. There will likely be definite sour tones. There is not much body in cinnamon roasted coffee.
New England
A term not as frequently used as the others, though this roast is apparently common in the eastern United States. It’s a little darker than the cinnamon roast, but without the grainy flavor. New England roast will still have some sour tones to it.
American, Light
Medium light brown beans. This roast is the norm for eastern USA. This roast (and sometimes cinnamon as well) is the most often used for cupping or professional tasting.
City, Medium
The color is darker still, more of a medium brown (think chocolate). This roast is common in the western parts of the USA. This roast is a good choice to taste the differences between varietals.
Full City
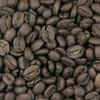
Medium dark brown beans. The beans will start to show some oily drops on the surface with this roast. Full City will have caramel or chocolate undertones.

Full City plus (Vienna Roast)
Medium dark brown beans. The beans will start to show oily drops on the surface with this roast. Full City plus will have caramel or chocolate slight burned undertones.
French Roast
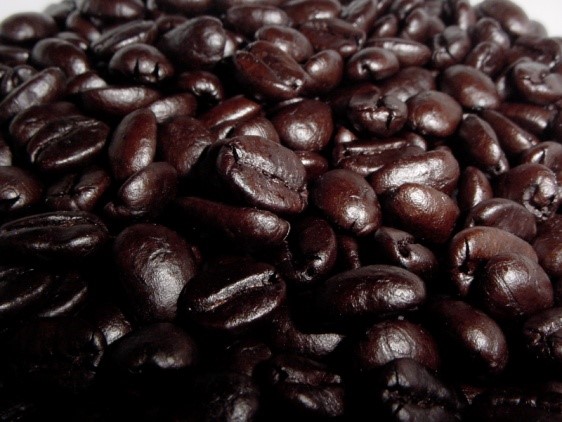
Beans are starting to get dark brown, and French roasted beans are shiny with oil. There is less acidity, but with burned undertones. This roast is often used when making Espresso. Many people think this is the darkest roast available, but that’s not true.
Dark French (Italian roast)
Similar to regular French, but more so. Darker and oilier looking, and with a stronger burned flavor.
Dark French Plus (Spanish roast)
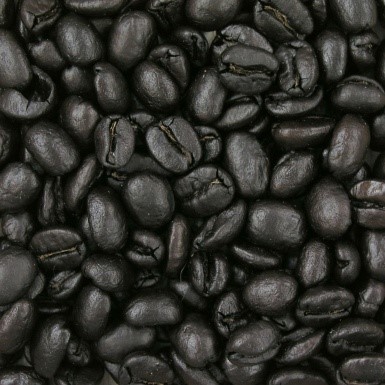
Darkest roast of all. Color is nearly black, and the flavor is flat with a charcoal undertone.

Coffee Cupping
Cupping is one of the coffee tasting techniques used by cuppers to evaluate coffee aroma and the flavor profile of a coffee. To understand the minor differences between coffee growing regions, it is important to taste coffee from around the world side-by-side. Cupping is also used to evaluate a defective coffee or to create coffee blends.
Tasting Coffee

Coffee Table Preparation
In a coffee cupping session, the table is usually set up with 6 to 10 cups per coffee. These are fashioned in a triangular manner. At the top of this triangle you should place a sample of the roasted coffee and a sample of the green coffee. In the center of the table place a cup of room temperature water and an empty cup containing the cupping spoons. Cover both the green sample and roasted sample until the cupping session is over and the coffee aroma, fragrance, and flavor profile have been documented. After this time, the coffee samples could be uncovered and additional comments can be written based on appearance. This method will help reduce the common “eye cupping” technique.
Coffee Sample Preparation
To prepare the coffee samples, place 2 tablespoons of freshly roasted and freshly ground coffee in a 6 oz cup. Ideally one should use 55g of coffee per liter of water. The grind should be between a French press size and a drip coffee size. The coffee should be roasted light (Agtron 65). In the industry we often stop the roast about 30 seconds into the first crack long before the start of the second crack. This allows us to fully evaluate the coffee for defects and for the sweetness and aroma that are burned off at darker roasts. The roast should be similar for all of the coffees evaluated. During an important coffee cupping session the roast similarity can be verified visually by grinding a portion of each sample and lining the coffee samples up next to each other on a black sheet of paper.
Coffee Fragrance and Aroma Analysis
While the filtered water is boiling, smell the coffee grounds and write down your observations. The smell of the grounds (before water is added) is referred to as the fragrance.
Then add hot water–just off the boil–to each cup. At this time you should also add hot water to the cup containing the spoons so that the spoons stay at the same temperature as the cups containing the coffee. Smell each cup without disturbing it and write down your initial observations of the coffee aroma.
After 1-2 minutes, break the crust of the coffee using one of the preheated spoons. Put your nose directly over the cup and push the coffee down. This is the most potent burst of aroma you will have during cupping and is the best time to evaluate the coffee aroma. As you break the crust stir the cup a little to make sure all of the coffee is covered in water and to help the coffee sink to the bottom of the cup. Add any further description of the aroma to the description you wrote before breaking the crust.
Rinse the spoon in hot water and move to the next sample. After evaluating the aroma of all of the samples, scoop out any grounds that continue to float. Due to the high density of the lightly roasted coffee most of the grounds will sink.
Coffee Flavor Analysis
After the coffee has cooled sufficiently take some coffee into the spoon and slurp the coffee strongly to aspirate it over the entire tongue. It is important to aspirate strongly since you are trying to cover the entire tongue evenly. Aspirating strongly will also cause tiny droplets of coffee to be distributed into the throat and into the nasal passage. The nose can act as another powerful tasting tool. Most of the flavor observed in a coffee is a result of aromatic compounds present in the coffee. This effect can be demonstrated by plugging your nose while drinking coffee. While the nasal passage is blocked, the coffee will likely taste similar to instant coffee due to its lack of aroma. When the nasal passage is opened, a full rainbow of flavors will immediately become evident.
After each coffee taste test, write down your observations of coffee taste, acidity, aftertaste, and body. Move to the next cup and try to compare the different cups. As the coffee in each cup cools, it is often possible to detect new flavors. Therefore, it is important to cup a coffee when it is both warm and when it has cooled to just above room temperature. The best coffees will have positive characteristics at both ranges of temperature.
If you are cupping more than a couple cups of coffee, it is advisable to spit out the coffee after evaluation. When cupping several coffees it is possible to have too much caffeine, which can adversely alter your cupping ability.
Coffee Cupping Conclusions
The key to cupping coffee is practice and humility. The best cuppers I know are modest and always eager to learn more. I have served on cupping juries with some of the best in the world and we do not always agree. The beauty is that we agree to disagree while respecting and trying to identify the characteristics that other people find.
Do not be intimidated by people that try to impress you with some abstract description of a coffee. This is more of a romantic tribute to a coffee rather than a reality. Cupping coffee should be fun and interesting, but not a contest of who is more articulate. On the other hand, your description should be more substantial than a reiteration of a textbook definition of a coffee.
Despite the strict, scientific-like protocol to coffee cupping, the method followed in the industry is quite varied and almost every good cupper has his or her own permutation. Cup under conditions you like, but try to stay close to the standards in case you need to cup with other people.
The secret to becoming a good coffee cupper is simple: trust yourself by practicing regularly and be humble enough to continue to learn from others.

Coffee Brewing coffee is as much of an art as it is a science. The history of coffee brewing equipment is rich, and methods of brewing are culturally dependent. Of the thousands of coffee machines and coffee brewing devices invented since the advent of coffee consumption, only a few have gained worldwide popularity. The coffee brewing methods discussed below are recommended since they have been found to maximize the extraction of the beneficial flavors of coffee, while minimizing the extraction of bitter coffee compounds a nd undesirable components.
Procedure of Making Coffee: Directions
The following general rules apply to each coffee making process discussed.
Coffee should be brewed for 4.5-5 minutes using a ratio of 55 grams of ground coffee per liter of filtered water (195-205°F).
It is convenient to use 2 tablespoons of coffee per 6 ounces of filtered water.
Filtered water and spring water are recommended.
Tap water imparts off flavors to the coffee and some minerals are essential to coffee flavor.
Distilled water is not recommended for brewing coffee as it lacks the minerals to bring out the natural flavors of the coffee.
Coffee Maker Reviews
French Press:
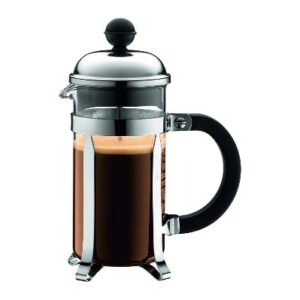
The best way to control the time and temperature is to use a French press coffee maker. The French press offers unparalleled flavor due to perfect extraction time and delivery of the volatile oils that are often trapped in paper filters. A French press is also the least expensive coffee brewer available. To make coffee in a French press: boil the correct amount of water, freshly grind the coffee beans using a course setting, remove the plunger, place the coffee grounds at the bottom of the glass, add the hot water, stir by shaking, and after 4-5 minutes press the plunger down to separate the grounds from the extracted coffee. The best French presses are made by Bodum and come in sizes of 3 and 12 cups. An insulated version is also available. Note: You do not want to pour boiling water directly onto the coffee. The goal is to brew coffee at a temperature between 195-205°F.
Unfortunately, French press coffee makers are not quite as convenient as a drip coffee makers due to preparation time and cleaning time. The French press also loses heat faster than some other methods, but extraction at slightly varying temperatures will promote a more dynamic and complex cup of coffee. To minimize heat loss effects, Bodum has developed an insulated coffee press. This press is highly recommended for both design and attention to coffee brewing details.
A novel integrated electric water heater-French press is available from Chef’s Choice. This French press minimizes the complexity of using multiple devices to boil and then brew the coffee. We use it daily at the Coffee Research Institute and highly recommend it for those who want to simplify the brewing process without sacrificing quality.
Vacuum Coffee Pot:
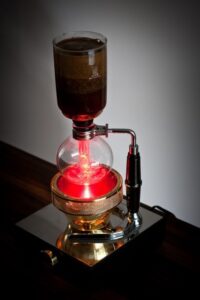
he vacuum coffee pot is a clever device invented by Robert Napier in 1840 that prepares an exceptional cup of coffee with a potent aroma. This is an appropriate alternative for those who have an aversion to the taste of the paper filters from drip brewers or for people who dislike the sediment in the bottom of the cup from the French press method.
To brew coffee in a vacuum pot, add the proper amount of filtered water to the bottom bulb, attach the filter to the upper bulb and fit the upper glass bulb tightly over the bottom glass bulb. Place the vacuum coffee pot on the stove, making sure that the bottom bulb is completely dry on the outside. Use a medium grind and add the grounds when the water begins to fill the upper chamber. Leave the pot on the stove for 3.5 minutes and then place on a hot pad. Within 30 seconds the lower pot will cool enough to form a vacuum to pull the brewing coffee into the lower chamber, thereby separating it from the grounds. Experiment with the heating and cooling cycles until the total extraction time is between 4-5 minutes. A great and inexpensive vacuum coffee pot available is the Bodum pot (pictured to the left). An electric vacuum pot (pictured to the right) is also available from Bodum.
Automatic Drip Coffee Maker:
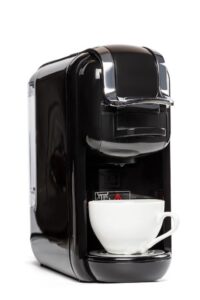
The easiest way to brew coffee is by using an automatic drip coffee brewer. Unfortunately, few coffee machines brew at the right temperature for the correct amount of time. The best drip coffee makers currently available are produced by Techni Vorm and distributed by Boyd’s coffee and Sweet Maria’s Coffee. Of the available models, the MoccaMaster Clubline KB 741 with the insulated carafe is probably the best drip brewer available on the market.
To brew coffee in a drip brewer, place a thick paper filter in the brewing cone (basket) and thoroughly wet with water. This helps remove the paper taste from the filter. Then freshly grind the coffee using a medium grinder setting. As the water begins to boil, pour the coffee into the coffee filter. Now as the water pours over the coffee, shake the basket (removable in the Technivorm) to ensure an even extraction. Brew time and temperature are taken care of automatically. If your brewer has a hot plate under a glass carafe, remove the carafe after the coffee is fully brewed to prevent the coffee from burning.
ESPRESSO

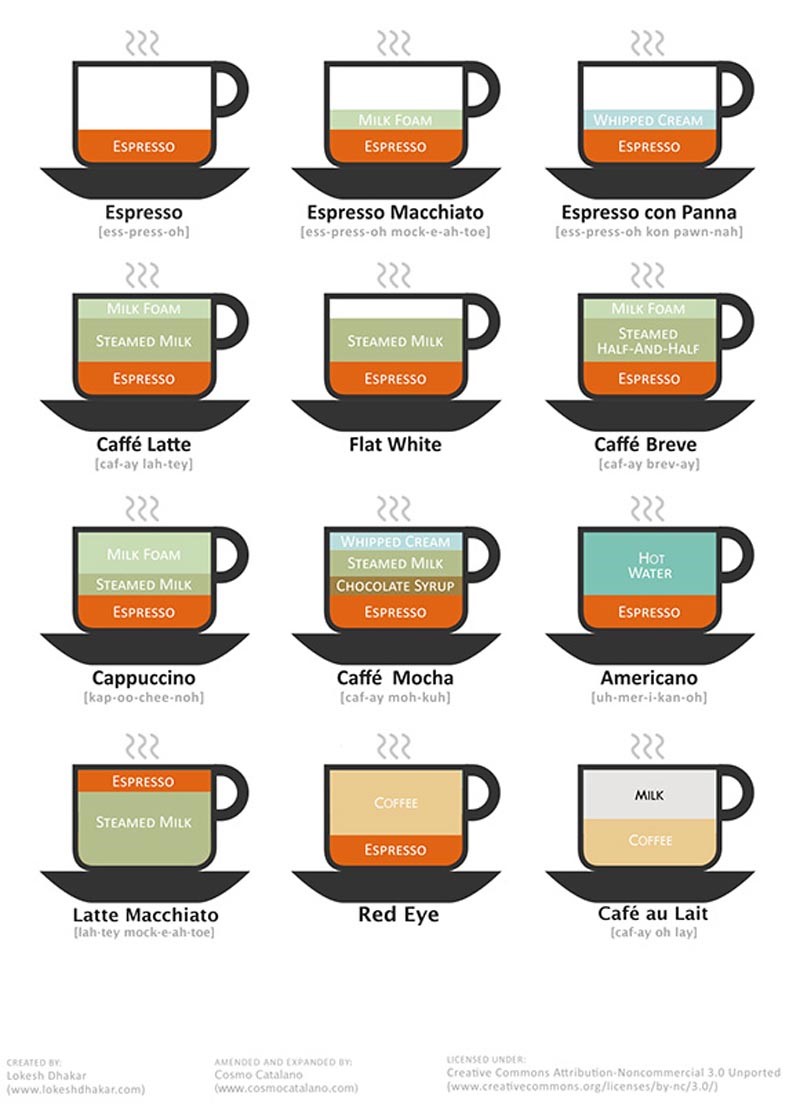
How to make an espresso drink?
1. choose the right coffee beans
2. fine grinding
3. leveling the coffee ground
4. tamping
5. choosing your cup
6. heat your cup
7. pulling an espresso
8. steaming the milk
9. pouring milk to espresso
10. art your coffee choices
The best espresso should be extraordinarily sweet, have a potent aroma, and flavor similar to freshly ground coffee. The crema should be dark reddish-brown and smooth, yet thick. A perfect espresso should be enjoyable straight with no additives, yet bold enough to not disappear in milk. A pleasant and aromatic aftertaste should linger on the palate for several minutes after consumption.
The following steps describe in detail how to make espresso. You will also learn about the various factors and problems with espresso that limit its perfection. If any of these factors are off, you will not achieve a high quality espresso.
Making Perfect Espresso, Blending Espresso
Without a good espresso coffee blend you cannot have a good espresso. The best espresso coffee beans are blended to achieve the sweetness, aromatics, and smoothness desired in espresso. The espresso blend must also be fresh. We recommend using espresso within four days of roasting. Please see the espresso blending section for help on creating your own blends or order some excellent espresso blends from roasted coffee suppliers, such as Caffe D’arte or Espresso Vivace.
Roasting Espresso
Too often you will find espresso roasted very dark. This results in a bitter, charcoal tasting brew. People that know how to make an espresso will roast light to preserve the aroma and sugars. For more information, read the section about espresso roasting.
Grinding Espresso
The grind must be continuously monitored throughout the day to achieve an extraction time of 25-30 seconds. Do not change the pressure you tamp with to compensate for a grind that has become too large or small. For more information, read the section about espresso grinding.
Espresso Grinder
A high quality burr grinder is essential for espresso. A conical burr grinder is preferred to flat burrs since the particle size is more even, they last longer, and the coffee is not heated during the grinding process. If the burrs become hot the coffee aroma will be diminished. A conical/parallel hybrid blade is considered the best design by many coffee professionals.
Dosing Espresso
Coffee must be freshly ground to achieve peak flavors. Grind and dose on demand. When someone orders an espresso grind only what is necessary for one shot, dose properly, tamp, and brew. Discard any espresso grounds that are not used within 30 seconds. For more information, read the section about espresso grinding and dosing.
Distribution in Portafilter
Distribute the coffee evenly after dosing in the porta-filter before tamping.
Tamping Espresso
Tamp the coffee once very evenly with 5 lbs of pressure, then once with 30 lbs of pressure, and polish 720° with 20 lbs of pressure. For more information, read the section about espresso tamping.
Water mineral content
The water used for espresso must be filtered. Some cities must even compensate for the mineral content of their water. Over time oxygen will be forced out of the water in the espresso machine leading to off tasting water. Try filling a small glass with water, letting it cool, and tasting it for off flavors. If the water tastes strange you may want to dump the tanks daily and begin with fresh water.
Water temperature
The water temperature should be stable and somewhere between 92-96°C. Choosing the best espresso machine is very important to both water temperature and temperature stability.
Temperature stabilizing
A stable temperature helps ensure that you prepare excellent espresso. For more information about stabilizing the temperature of your espresso machine, read about espresso temperature stabilizing.
Water pressure for EspressoThe pressure of the water forced through the espresso should be between 9 and 10 atm. This pressure is responsible for the development of the crema.
Boiler pressure
The boiler pressure determines the amount of water to be incorporated in the steam. If your milk is not foaming correctly as described in the section on latte art, you may want to experiment with different boiler pressures. Boiler pressure, however, should only be altered by professionals. You can check your boiler pressure by looking at the boiler pressure gauge on the front of most espresso machines.
Extraction time
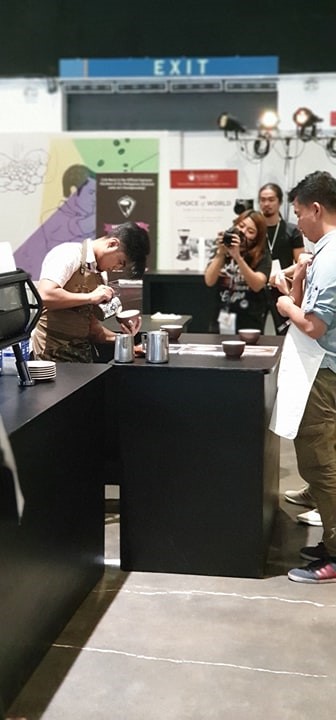
Extraction time to fill two 1-oz cups should be between 25-30 seconds. Despite the time the pump should be turned off if the espresso becomes slightly lighter in color. The goal is to have a dark red espresso take approximately 25-30 seconds to brew with no change in color. Fore more information, read the section on extracting espresso.
Porta-filter and basket
The porta-filter should always remain the same temperature as the water used to brew the espresso. Therefore it should always remain in the group head. The basket should hold 16-18 grams of coffee and must be straight walled. Curvatures in the basket will lead to uneven extraction.
Timeliness
Act quickly, but carefully. You should spend no longer than 30 seconds for the time it takes to dose, distribute, tamp, pre-heat, and brew the espresso.
Espresso machine cleanliness
Coffee machine cleaning is probably the biggest problem with espresso today. If the machine, basket, and porta-filter are not cleaned regularly, the espresso will always taste rancid.
Espresso grinder maintenance
Everyday the burr blades should be swept clean. Between shots you may want to brush out the excess espresso that gets stuck between the burrs and the dosing chamber. The burrs must be replaced at least yearly so that they continue to produce coffee granules with a maximal surface area.
Environmental Factors
The humidity and temperature will change throughout the day. Since coffee is hydroscopic (absorbs moisture), the grind size must be changed throughout the day to achieve a brew time of 25-30 seconds. The temperature will not affect the espresso like the humidity, but it is important to avoid exposing the coffee to any high temperatures until brewing.
Espresso cup
The espresso cup should be pre-heated from a source other than the espresso machine. Filling a cup with water from the espresso machine prior to brewing the espresso will lower the temperature of the water in the boiler and the espresso extraction will be uneven. The espresso cup should have thick walls and a narrow mouth to retain heat and aroma, respectively.
Practice makes perfectIf you want to learn to make espresso, it is essential to practice and experiment. The key to making espresso is to realize that it always has further potential. By changing any one of these factors you can improve or diminish its potential. Espresso preparation is an art that demands the precision and dedication of science. I have never achieved, nor have ever seen anyone make a perfect espresso. A perfect espresso is more of a concept than an actuality. The beauty is that espresso is volatile and difficult. If it were easy, we would develop a machine that knows how to make a perfect espresso every time. There are so many factors involved in espresso preparation that only a human mind and a passionate heart can begin to understand and control its complexity.
check out our new website!